Top 10+1 things you need to know about Final Cut Pro X
#1 - File management
The key to efficient editing is organisation. Know where your assets are and what they are. Click here for more information.
The key to efficient editing is organisation. Know where your assets are and what they are. Click here for more information.
In Final Cut you have Libraries in these you have events and in those you can have projects and collections.
|
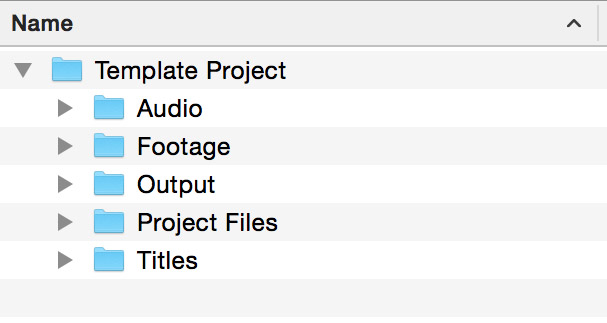
My Files on my computer mirror the structure I have in my NLE. This makes each project self contained allowing easy transfer and backing up of a whole project.
|
#2 - 3-Point Editing
So we know we can scrub our footage and click drag selections to then drag down to our time line. But you can also using "I' and "O" keys to create In and out points the select "W" key to insert strait to our play head.
So we know we can scrub our footage and click drag selections to then drag down to our time line. But you can also using "I' and "O" keys to create In and out points the select "W" key to insert strait to our play head.
#3 - J-K-L Keys
Scrubbing footage with the mouse is great to get a quick overview. You can also use the J, K and L keys to play Backwards, Stop and play Forwards. Double tapping the J or L key will make it go twice as fast. For more procession use the arrow keys to move frame by frame or to skip to the next clip up or down arrows.
Scrubbing footage with the mouse is great to get a quick overview. You can also use the J, K and L keys to play Backwards, Stop and play Forwards. Double tapping the J or L key will make it go twice as fast. For more procession use the arrow keys to move frame by frame or to skip to the next clip up or down arrows.

|

|
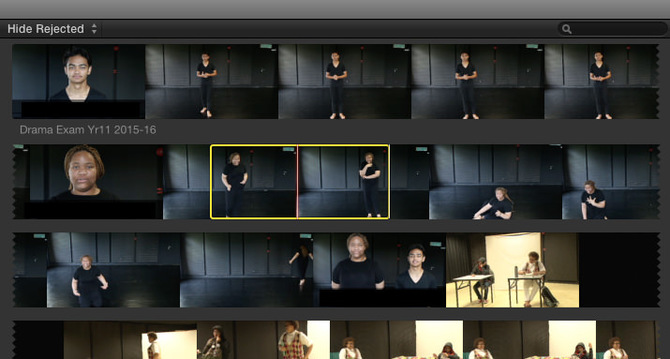
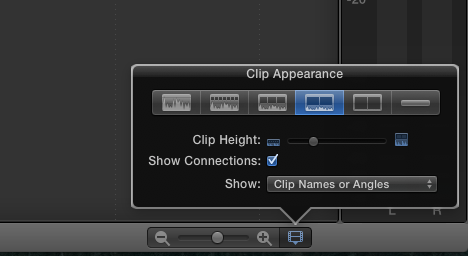
#4 - Navigating the Timeline
|
Shift-Z is my number 1 shortcut. It makes the whole timeline fit onto the screen. Plus ⌘- Shrinks the timeline and ⌘+ Zooms into the timeline.
In the bottom right on the timeline is the viewing options. This will increase the size of the tracks and show audio waveform. 
|
|
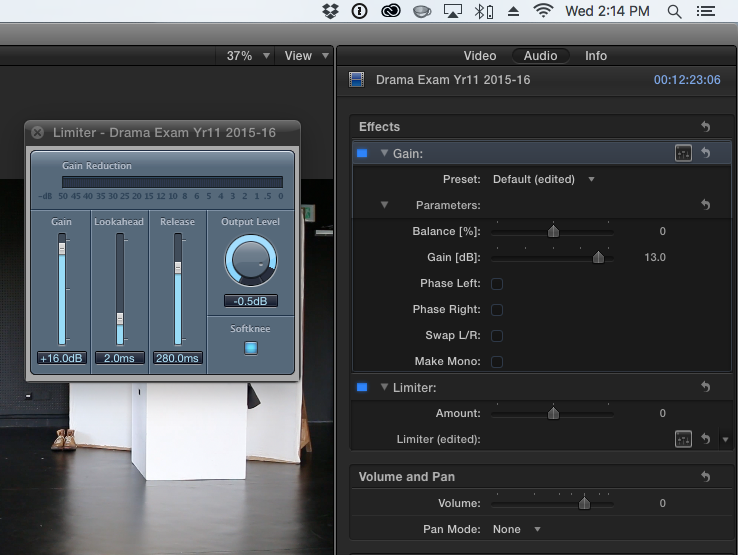
#5 - Audio Gain
Over the Wave Form on an audio track you get a line you can drag up and down giving you 12db of gain. Some times you need more.
The audio effect called "Gain" will give you more. I always use this in conjunction with a limiter effect to ensure there is no peaking.
Over the Wave Form on an audio track you get a line you can drag up and down giving you 12db of gain. Some times you need more.
The audio effect called "Gain" will give you more. I always use this in conjunction with a limiter effect to ensure there is no peaking.
You can manually fade the volume and Duck audio by creating key frames along the volume line. To do this hold "alt" while clicking the line. You can then click and drag this point to your desired location. Create multiple keyframes like the example bellow to duck audio.

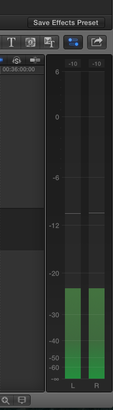
#6 - Peak Audio Monitoring
|
We need to ensure we have consistent audio levels/volume. We also want to ensure its not too loud or starting to distort. This is where the peak audio monitors come in. If you can't see them next to your timeline select them from "Window > Show Audio Monitors"
When increasing audio levels or stacking multiple tracks you want to ensure they never peak above 0. |
|
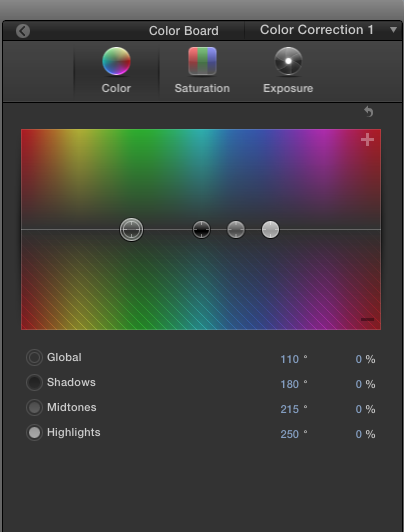
#7 - Colour Correction
To correct minor exposure issues or colour correction you need to apply the effect ''Color Correction" this will add the "Color Board" to your effects list under the video tab within the inspector. Clicking the right arrow will allow you to access the Colour, Saturation and Exposure settings.
To correct minor exposure issues or colour correction you need to apply the effect ''Color Correction" this will add the "Color Board" to your effects list under the video tab within the inspector. Clicking the right arrow will allow you to access the Colour, Saturation and Exposure settings.

|
|

|
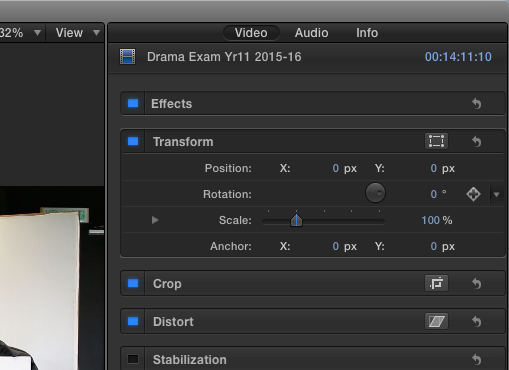
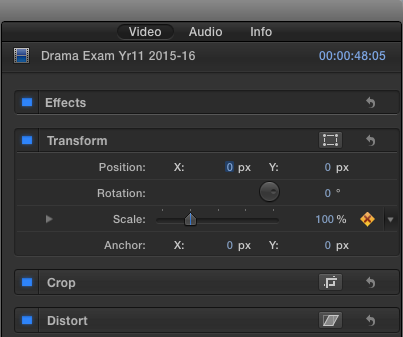
#8 - Transform
|
Under the video tab in the Inspector you will find 'Transform' Clicking 'show' will open up the different options for Position, Rotation, Scale.
These tools can be used to fix the horizon line, crop out unwanted objects and reframing remember as soon as you scale past 100% you will be losing quality and its always best to get it right in camera. |
|
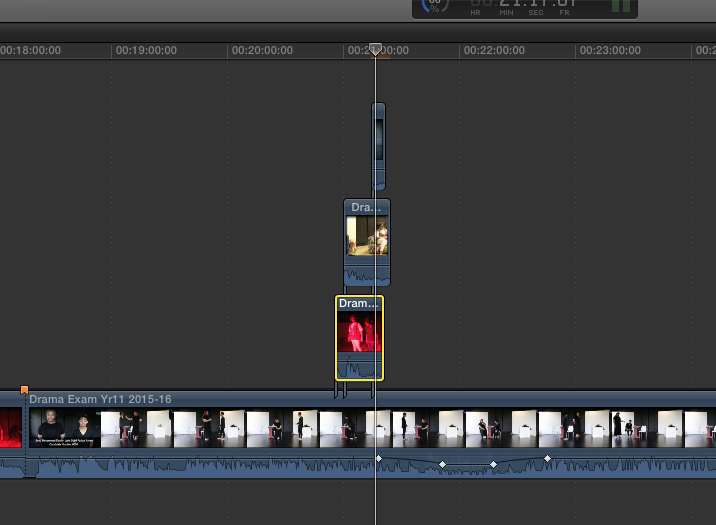
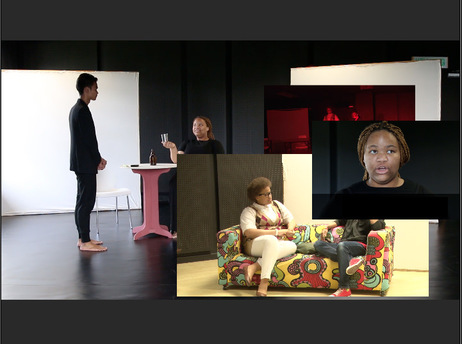
#9 - Layers/Staking/PIP
You can drag clips on top on one another. This will link the above clip to the master clip. By using the transform and crop options you can scale and alter the position of the clips to make picture in picture or split screen. The order in which you stack is important the top layer will be top of the stack and visible over the bellow tracks.
You can drag clips on top on one another. This will link the above clip to the master clip. By using the transform and crop options you can scale and alter the position of the clips to make picture in picture or split screen. The order in which you stack is important the top layer will be top of the stack and visible over the bellow tracks.
|
|
Note: You can also use the "V" key to disable a clip. This is useful if you have tracks stacked and want to see underneath a layer.
#10 - Keyframe
Most of the settings within the Inspector can be animated using key frames. This is done by selecting a point in time and telling final cut to remember the settings by clicking a plus arrow next to any parameter (it only appears when you hover your mouse over it) then moving to another point in time changing the settings and again set a key frame. Final Cut will now animated between these two keyframes changing the settings from A to B.
Most of the settings within the Inspector can be animated using key frames. This is done by selecting a point in time and telling final cut to remember the settings by clicking a plus arrow next to any parameter (it only appears when you hover your mouse over it) then moving to another point in time changing the settings and again set a key frame. Final Cut will now animated between these two keyframes changing the settings from A to B.
|
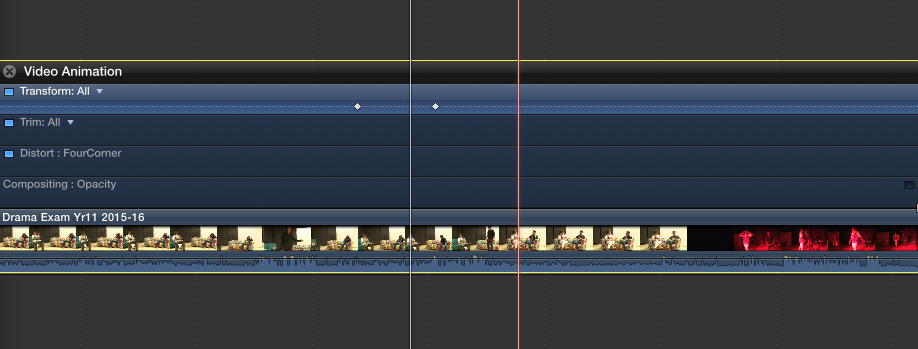
Above: Right click on the timeline and select "Show Video Animation" to see keyframes
Left: When a keyframe is set a yellow diamond will appear. |
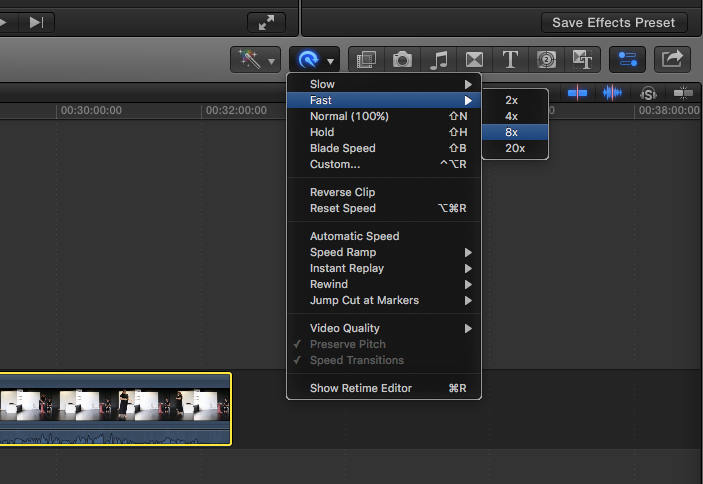
#11 - Time remapping
To make great slow-mo you need to record at a higher frame rate. However Final cut will allow you to slow footage down but often doesn't quite match the effect you desirer. It does do a good job of speeding up time. Use these tools sparingly and ensure there is a solid reason for using them. There are many more intelligent ways to show the passing of time.
To make great slow-mo you need to record at a higher frame rate. However Final cut will allow you to slow footage down but often doesn't quite match the effect you desirer. It does do a good job of speeding up time. Use these tools sparingly and ensure there is a solid reason for using them. There are many more intelligent ways to show the passing of time.