Microphone placement
|
Here we will look at how to place different microphones for different applications in the context of live production/recording within the Theatre space.
|
|
Vocals
|
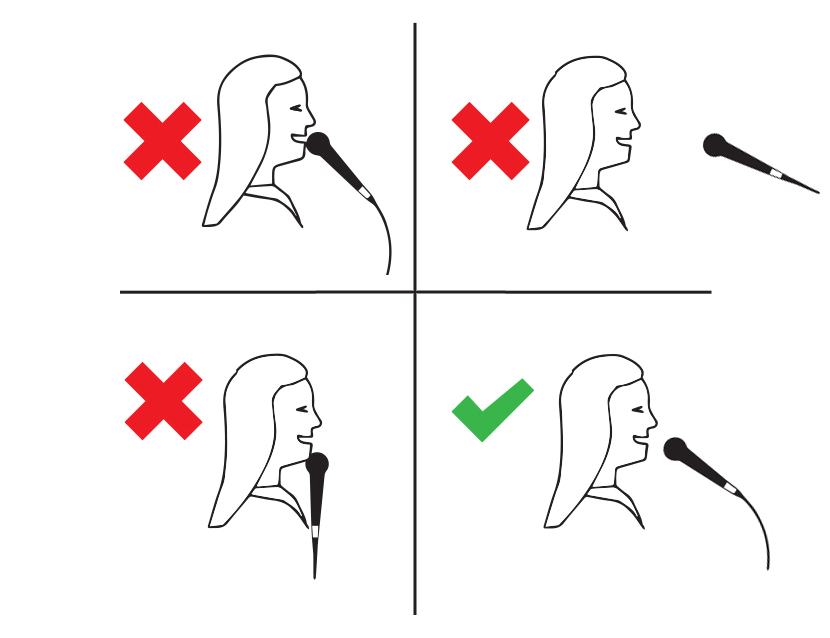
Handheld mic
Good mic control is an invaluable skill to ensure you get the most from a microphone. No matter how good you are if your not using the mic properly no one will hear how good you are. Like any skill it take practice and you need to become comfortable with the tool. A few Tips:
|
|
|
Lavalier
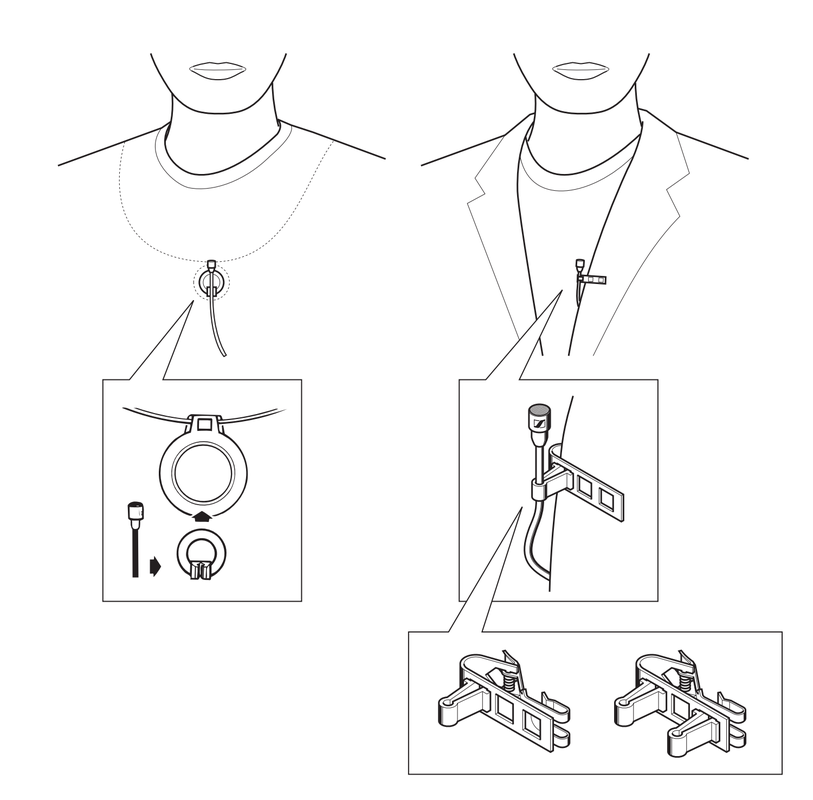
Lapels or Lavs are small omnidirectional microphones that are traditional placed with a clip to the centre of the chest 6 inches bellow the mouth. They are great for capturing individuals vocals at a close proximity and a super discreet. Tip. Tape the cable in a loop to the clothing out of sight and guide the cable to where the wireless transmitter is placed. Tip. Placing the mic too high will cause the chin to block sound and can introduce breathing noise. Tip. If you get unwanted sound you can use a wind shield on the mic to limit breathing/wind/movement noise. |
|
|
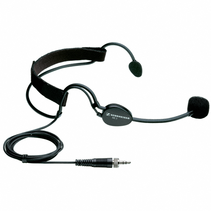
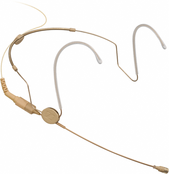
Headset
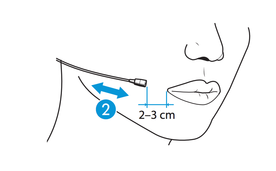
A headset mic is not designed to be discreet. This example the ME 3-ew from Sennheiser provides a Cardioid condenser microphone with a sturdy frame. When fitting ensure the capsule is facing the talents mouth. The goose neck boom can be bent to the appropriate shade. Note you don't want the mic in or on there mouth but just in front on it. Tip. Take off the wind shield so you can see where the mic is pointing. Tip. A short peace of tape on the back of the neck will ensure the headset isn't pulled if the cable is tensioned. Headmic
This head mic, unlike the head set is made to be discreet. This example the HSP 2 from Sennheiser provides a much smaller frame with an omnidirectional condenser microphone. Tip. This model has a cable tension release on the back but additional tape is advised on the back on the neck under clothing. Tip. With the thiner boom you may need to tape directly to the cheek to stop the boom moving/vibrating and creating unwanted noise. |
|
|
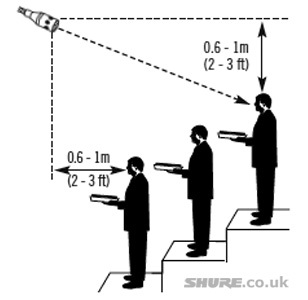
Ensemble Vocals or Choir
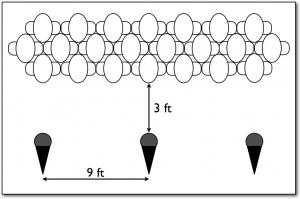
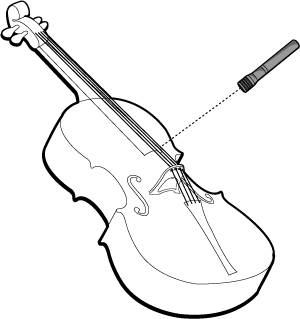
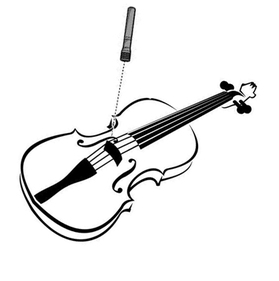
So far we have looked at recording from a single source but what it we want to capture multiple sources. It is not always wise to duplicate microphones as this can introduce phase cancellation. This is where certain frequencies cancel each other out leaving them missing from your mix. Here is an article to explain phase issues in more detail. By placing a mic 2ft in front of the singers it will widen the pickup pattern to capture multiple singers.If there are multiple rows of singers. you will need to raise the mic upwards and point towards the centre of the mass. When we start to need additional mics is when we are missing vocals from the edges of one mic. You need to think carefully about the overlap of your mics. The rule of 3:1 means for every meter/ft the mic is in front of the source it will need to be spaced out 3 times this. |
|
Instraments
|
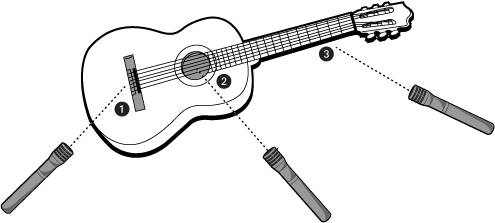
Acoustic Guitar
When micing caustic instruments there are no exact rules on placement. Think more of the range of tones a mic can pick up in relation to where they resinate from. For example mic 2 in this diagram will capture more bass tones nearer to the sound hole compare to 1 and 3. This will diminish as placement moves up the neck to position 3. Experimentation is key to find the sound you want. If you only have one mic start at position 2 and move towards position 3 until you have a balance you are happy with. |
|
|
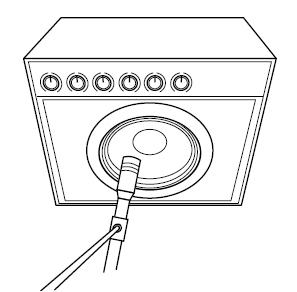
Amplified instruments
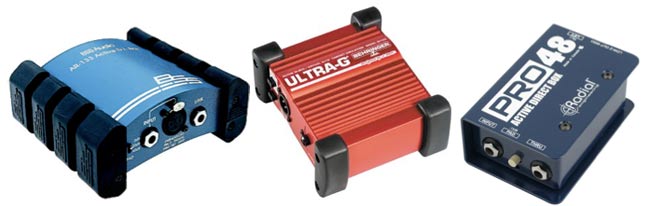
As the acoustic guitar the same applies to the micing of amps. The nearer the centre of the speaker the more base tones are created. Making a slightly off centre position a best all round position. Tip. Ensure the mic is directly face the speak cone. Tip. Dynamic mics fair better with strong signals compared to condensers. e.g. Sure SM57 DI Box Direct Input or Direct Interface boxes take a high impedance, unbalanced signal and converts it to a low impedance, balanced signal. This allows you to take a signal from an amplifier, guitar or bass pass it through a DI and into a mixing desk via XLR over longer distances without introducing unwanted noise. I mentioned this here as like using multiple mics you have the potential of phase cancelation if you DI and mic an amplifier. |
|
|
Drum Kit
In a studio setting the drums would normally have a mic for each symbol, tom, snare, hight hat and bass drum. But on stage this would not be particle. Especially if the kit needs to be removed at any point. This video demonstrates how to get the best from placing just one microphone. |
|
General Placement
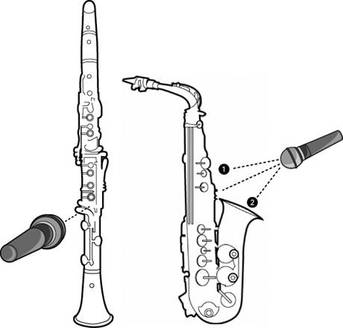
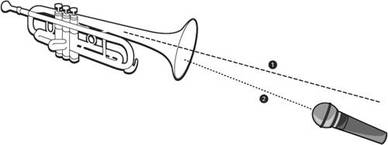
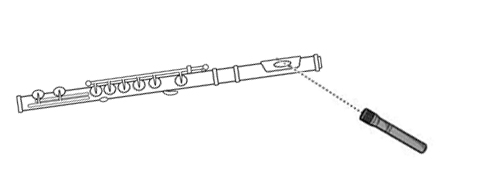
The general rule of thumb is you want to point the microphone where sound is resinating from. This is not always as obvious as you may think. Moving placements slightly one way or another will give different dynamics, more bass or more higher tones and there is not a right or wrong placement. You may want a different placement and thus different type of sound depending on the style of music or acoustics of a room. Experimentation is key and working with someone the monitor audio as the placement is moved can sometimes reveal the sweet spot.
The general rule of thumb is you want to point the microphone where sound is resinating from. This is not always as obvious as you may think. Moving placements slightly one way or another will give different dynamics, more bass or more higher tones and there is not a right or wrong placement. You may want a different placement and thus different type of sound depending on the style of music or acoustics of a room. Experimentation is key and working with someone the monitor audio as the placement is moved can sometimes reveal the sweet spot.

|
|
