Sound
|
Good quality sound and effective sound design will transform your video. No matter how great your video looks if the sound is not up to scratch it will feel amateur.
There are many types of microphones all have there advantages and disadvantages with different interfaces, pickup patterns and requirements. Choosing the right tool for the job is the first step then optimising the setup to work with that mic is the next. No matter what mic you choose proximity to the sound source is key. |
|
This video explains it all bit rates, sample rates, balanced, unbalanced, impedance. The whole sequence from recording device to the mic. The next video looks at the science of audio and the different microphone types.
|
|
|
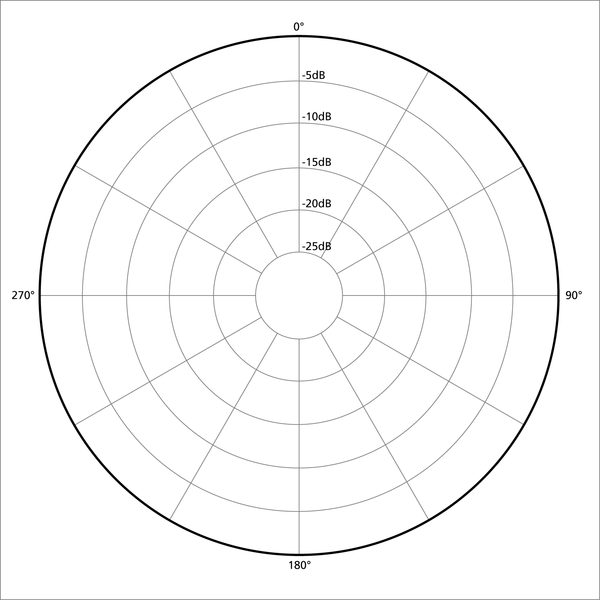
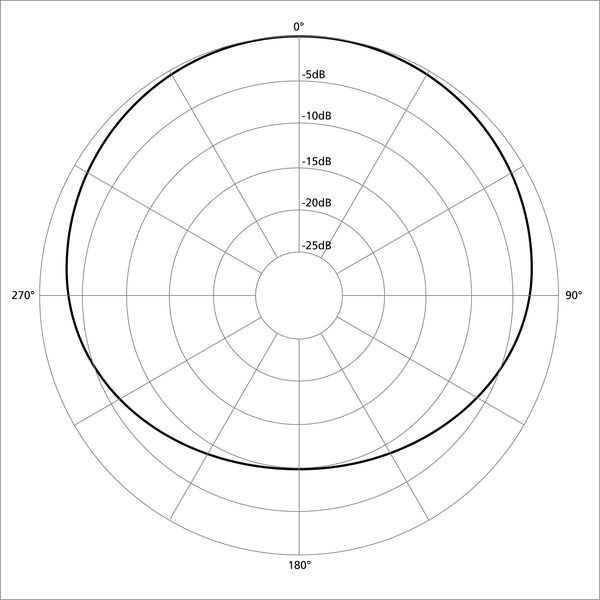
Pickup Patterns
Omnidirectional
Subcardioid
|
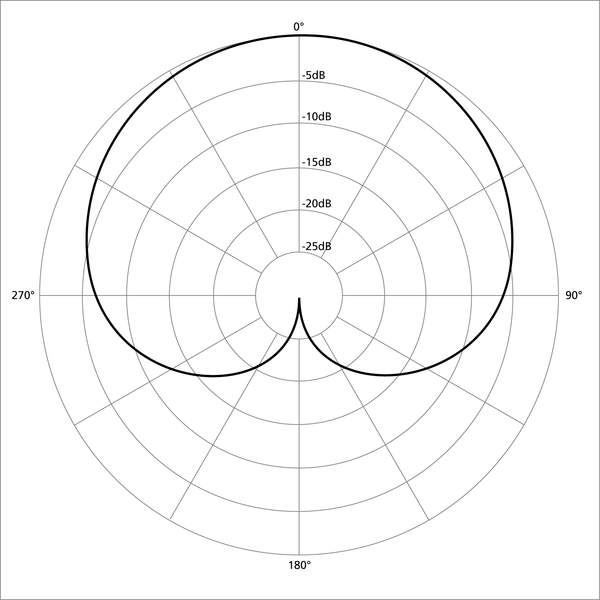
Cardioid

Supercardioid
|

Hypercardioid

Shotgun
|
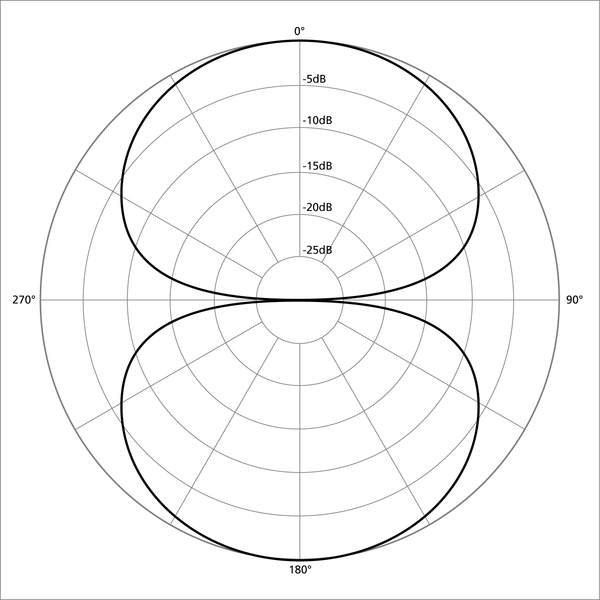
Figure of 8
|
|
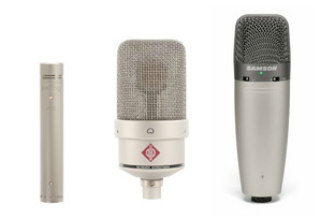
Microphones
From Left to right:
|
Each microphone has its own unique characteristics. You will need to choose the right mic for the right job. This is completely dependant on your scenario, location and your constraints.
Lapels - easy to fix discreetly to an actor for dialog along with wireless transmitter. Shotgun - highly directional mic works well with a boom pole to control proximity and direction to subject. Small condensor - or pencil mics are great for clarity with close proximity. Being able to install these out of shot is key or with the use of a boom pole. Larger condensors - Can be used in studio's to record voice over or ADR. Here you can get the perfect proximity and use pop shields to prevent spiking. 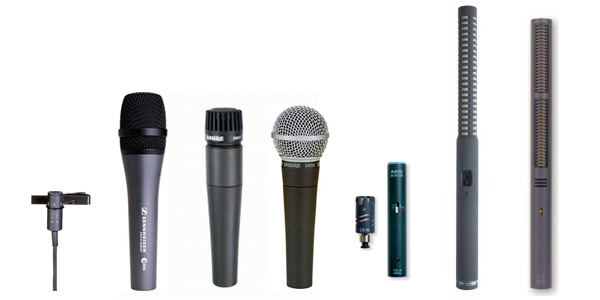
|
|
Wired and Wireless Audio
Basic audio cables you will already be familiar with. The 3.5mm jack is commonly used with headphones and is everywhere. Each line separates out a single proving stereo sound. |
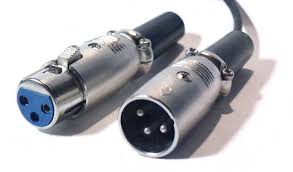
An XLR is the cable of choice for all professional microphones. Providing balanced audio with a lock in place connector. Balanced audio is a method of reducing noise and interference to obtain maximum quality. XLR cables are mono, provide one signal but can also deliver power (Phantom Power). |
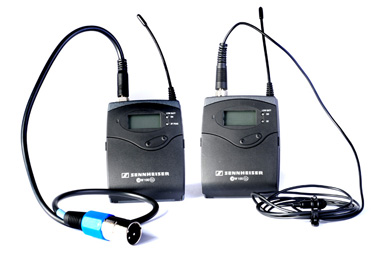
In some circumstances you may require wireless audio. For example an actor using a lapel mic who moves around a lot. Here you can use a transmitter pack along with a corresponding receiver pack to send the audio. They run on AA batteries and can go into a mixing next or directly to camera. Example: Sennheiser ew100 G3 |

|
|
|
|
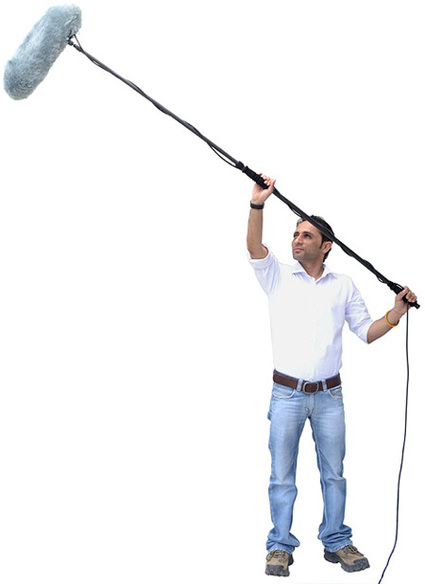
Boom Operator
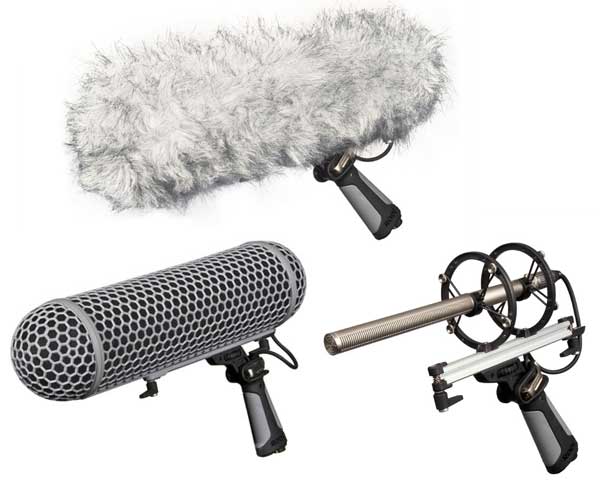
A boom pole is a great way of getting the proximity you need with a microphone while still being out of shot. Normally used with a shotgun microphone you need to think carefully about your placement and angle and how you plan on tracking movement. With added movement and handling the microphones are more susceptible to handling noise meaning the noise created by the vibrations on the pole work there way to the microphone. This can happen to any mic and various suspension systems are available to limit this noise. Also when moving around you may introduce wind to the microphone. When operating indoors it may a simple case of using a foam wind shield which will diffuse the wind hitting the mic directly. If working outside you will need a more robust setup for example a dead cat. This can be a simple pull on version like the foam wind shield or an all encompassing system like a blimp which can have a dead cat put over it. As the Boom Operator if you not happy with the audio you need to let the director know. You may even need to run a wild take where the scene is run without the camera so you can use mic placements that previously would have been in shot. This will give you more options in post production to mix tracks together.
|
|
|
|
|
|
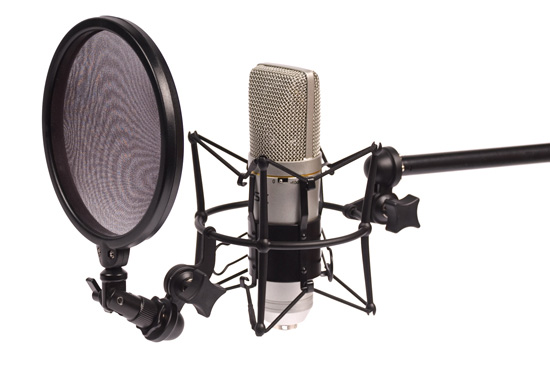
Studio Mic Setup
When recording voice over, foley, ADR in a studio context you can position the microphone in its optimum position. Its always best practice to mount your microphone in some sort of suspension to limit vibrations and unwanted sounds. In a controlled space you may not need a wind shield but when recording dialog at close proximity the sounds of 'P's' and 'T's' project more force agains the microphones diaphragm and can course unwanted sounds. This is where pop shields can be used much like a wind shield to limit this effect. The righthand image shows a mic within a suspension mount with a pop shield attached. |
|
|
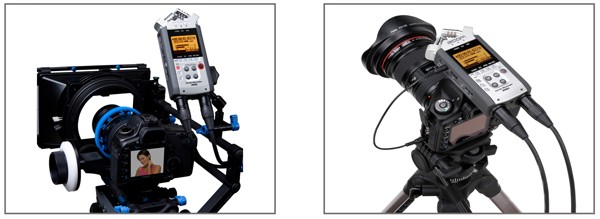
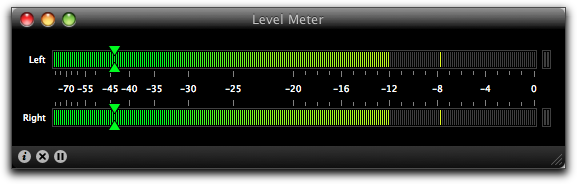
Dual System Sound
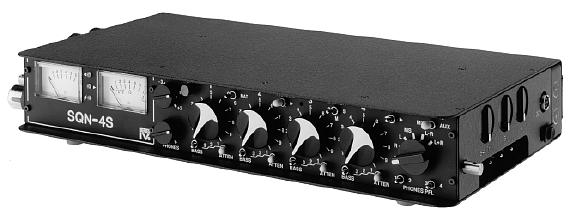
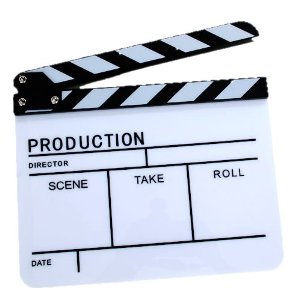
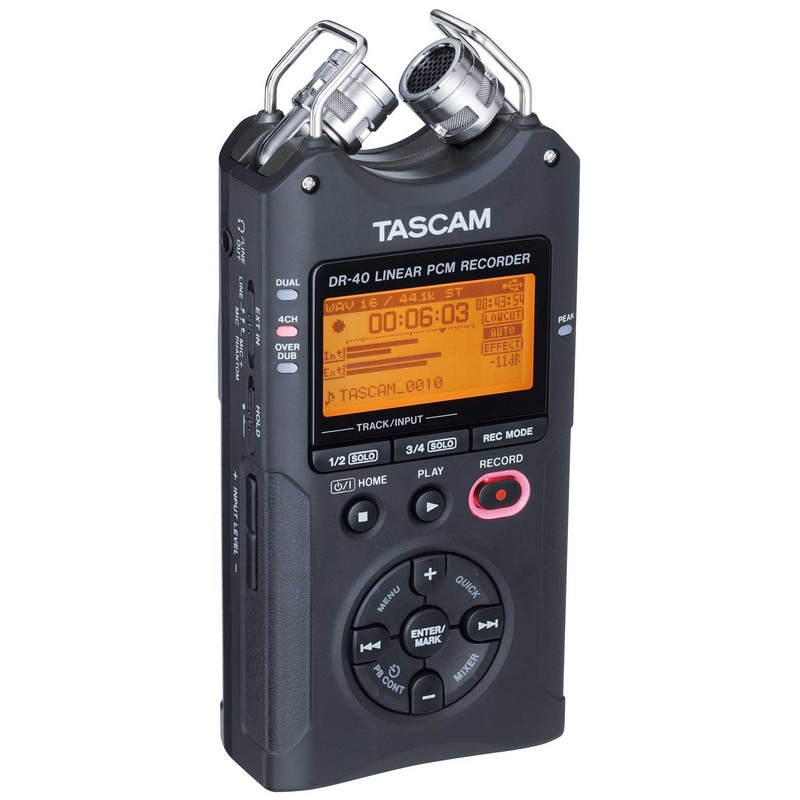
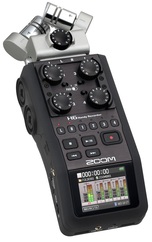
After using an SLR or lower spec camera you will quickly find that the onboard mic's are generally really bad and you may well be unable to connect professional XLR mic's or even headphones to monitor what you are recording. Alternatively your actors may just be too far away from the camera to get audible sound. Then you will want to think about dual system sound. This is were instead of recording sound to the camera you record it to an external device or Field recorders. Field recorders are becoming cheaper and fully featured. Right is a example of a Tascam DR-40 and a Zoom H6 and a Zoom H5 mounted to a camera. These are all able to receive XLR inputs, provide phantom power, capture full quality WAV files or compressed MP3. They provide a headphone output for monitoring witch is key to knowing what your recording. Along with a graphical Peak Programme Meter to visualise the input signal. To the right we have a SQN a Location mixer this is a battery powered mixer that allow multiple input signals to be monitored and adjusted on the fly. These units do not record but give you control and monitoring capabilities. You'll notice the more expensive Zoom h6 field recorder provides independent gain control for all 4 XLR inputs. Monitoring the signal is very important to ensure quality audio is being captured, that unwanted sound are at a minimum, the subject is audible and the signal is not peaking. Peaking being when the signal reaches over 0db and will begin to distort. The disadvantage to dual system sound is that it creates more work in post production as the video and corresponding audio will need to be matched and synced. Matching the clips can be made easier by efficient logging of the footage and sound report being kept during production. The syncing of the clips will require a reference point and this is where a Clapper Board comes in. Slating as it is referred as has two functions. Firstly it provide scene, shot and take info for quick reference when watching footage in post and secondly provides a 'clap' sound witch can be used as a reference point to sync the audio. That are also automatic software plugins that can now complete this labour intensive job for you by analysing the audio from each track without the need for a reference point. Even so you can never rely on a computer and its still worth investing time in to a well managed production to make life easier down the line in post. |
|
|
|
|
|
Room Tone
Every space has its own tone. This describes the way audio bounces off walls, objects and is absorbed by different surfaces and material. The persistence of sound after a sound is produced is called reverberation (reverb). When moving around a room recording from different angles the audio can sound like it's recorded in different locations. This breaks the continuity and the feeling that we are in one place. Recording room tone to bridge the differences in tone from our different shots can mask the edit. I'll leave the video to do better job of explaining. |
|
|
EQ - Equalizer
When the audio isn't sounding right may be too much bass or voice are squeaky EQ is where you want to go. It allows you to boost or reduce the different frequencies within the sound wave. 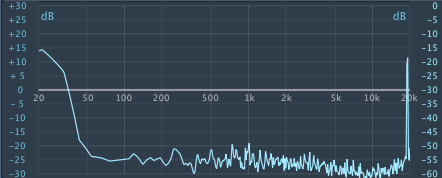
|
|
|
Foley
When on set the boom operator normally is focusing on getting clear dialogue. But what about all the other diegetic sounds in the scene. Foot steps, cloths rustling, actors interaction with objects, ambient sounds. For a balanced scene these need to be added in post to ensure the impact and life of the scene is not lost. |
ADR - Automatic Dialog Replacement
Some times what every you try on location you can't get the dialogue that you want and your left with the only one option. To rerecord the dialogue in a studio and dub it over the top in post production. This is an art form at takes a lot of patience and skill to make it a viable realistic solution. |
|
Mixing
Once you have all your sound elements your ready to mix the final film score. Creating balance and clarity between each element, working in unison to selling the shot.
|
|
|
Fix it in Post?
Although I can't embed this video its worth popping over to Vimeo to watch. Lots of great tips in getting good audio and the importance of getting good audio during the production. If the audio is awful in the original recording no matter what you do in post it's still going to be awful. |
|
